
5 steps to an accurate Google analytics account.
As a digital agency, we work with Google Analytics (GA) data daily. While we often set up these accounts for clients, many times we are working with pre-existing Google Analytics accounts that we did not set up. At Lewis, we make decisions based on data-supported facts instead of assumptions. And in order to do that effectively, accurate information is paramount.
To find that accurate information and learn more about who your users are and the performance of your website, it’s important that Google Analytics be set up correctly. Listed below are five simple steps to get you started:
1) Set Up Your Google Analytics Account
Before you start, make sure that you have a primary Google Account. If you have a Gmail, Google Drive, Google Calendar, Google+ or Youtube account, you can use these login credentials to create a Google Analytics account. If not, you will need to create one. Make sure that your new account is one you plan to keep forever, or you will not be able to access your Google Analytics account. NOTE: Do not let anyone create your website’s Google Analytics account under their own Google account. Should you and this person part ways, they will take your Google Analytics data with them and you will have to start over.
After creating a Google account, visit https://www.google.com/analytics/ to set up a Google Analytics account. Click the Sign Up button for Google Analytics and you will begin a guided three step process.
2) Add the Tracking Code to Your Site
Once you have completed the guided setup, click the button that says Get Tracking ID. You will be taken to a screen with a Google Analytics tracking code. THIS NEXT STEP IS ESSENTIAL. Copy and paste this code into the header of every page on your website. If the tracking code is not placed correctly, you will not receive any data. Where you place this code will depend on the framework the site is built upon; instructions for the most commonly used platforms are linked below.
- WordPress: Google Analytics Yoast Plugin
- Squarespace: Has a built-in setting for Google Analytics
- Shopify: Has a built-in setting for Google Analytics
- Bigcommerce: Has a built-in setting for Google Analytics
However, if you're using another platform you can easily find instructions to install Google Analytics by doing a web search for your platform + how to install Google Analytics.
3) Create Three Different Views
In order to keep your data safe and accurate, Google recommends creating three different views per property: Reporting View, Test View and Unfiltered View.
- Master view - You will use this view for the analysis of your data. This is where you will configure the filters, goals, segments, etc. You may even have more than one.
- Unfiltered View (raw data) - this is your backup data; you can also use it to check the progress of the filters. It's extremely important to keep this view unaltered so you don't loose any data
- Test View (Optional) - If you want to be extra cautious you can create a view for checking the filters before applying them to your Master View.
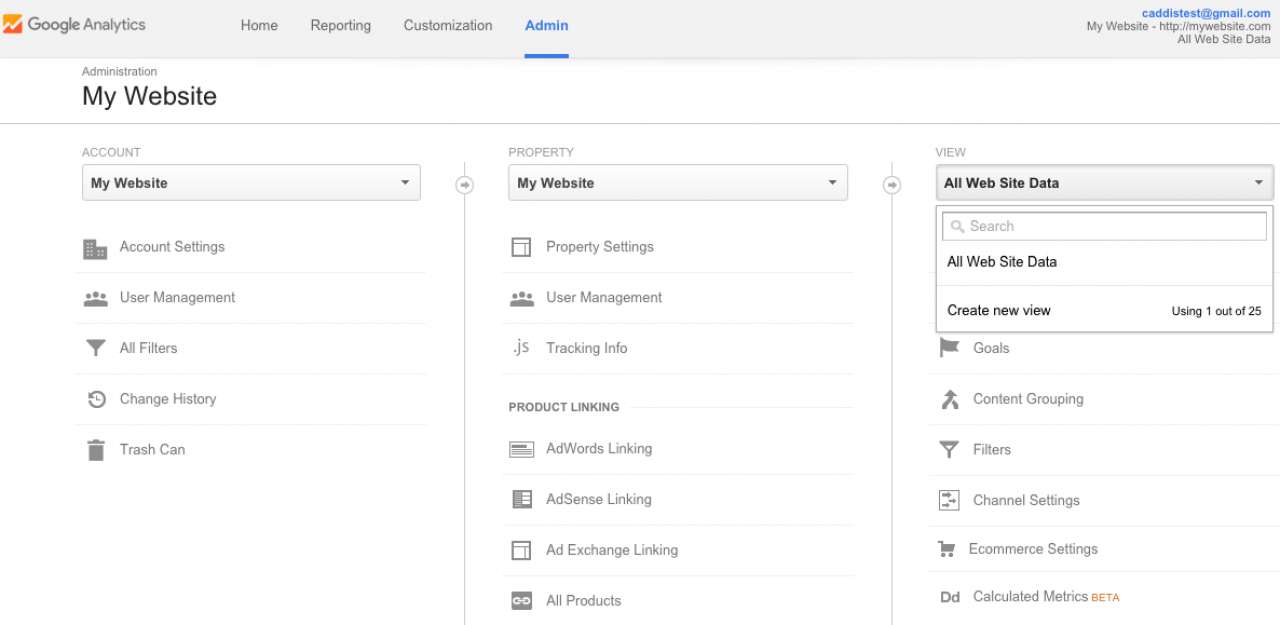
When you set up your account, you will automatically be given a view called All Web Site Data. Follow these steps to set up the other two views:
4) Filter Your IP Address
To get the most accurate data, you will need to exclude your own site visits from the Google Analytics data collection. You can easily do this by creating an IP Address filter. An IP address is a string of characters that serves as your personal browsing identity. Google and other search engines use IP addresses to differentiate one user from another. Finding your IP address is very simple. Use your preferred device in the location you most access your website. Google “What is my IP address.” The first result will give you the characters that make up your IP address.
Once you’ve found your personal IP address, you can then set up a filter in Google Analytics that omits your data from showing in the reports. This is an important step in keeping your Google Analytics as an accurate reflection of your true audience, especially if you visit your own website frequently. It's not only important to filter out your own IP but if you have remote employees or work with a marketing agency that is frequently visiting your site, you'll want to block their IPs as well.
To set up a filter, first click Admin in the menu bar at the top of the page. On the left side of the page underneath Account, click on All Filters. Then, click the red button that says Add Filter.
Name the filter. If you have multiple IP addresses you wish to exclude, use descriptive names. Choose something like “Home Office Desktop IP Address”. After naming the filter, select Predefined under Filter Type. Then choose exclude, traffic from the IP addresses, and from the three drop down menus. Once you have selected settings for each drop down, a space will appear for you to paste your IP Address. Finally, select the views you want to be filtered. When adding a filter, always try it on the Test View first. Once you feel confident that you have applied the filter correctly, go ahead and add it to your Reporting View.
5) Include Only Valid Hostnames
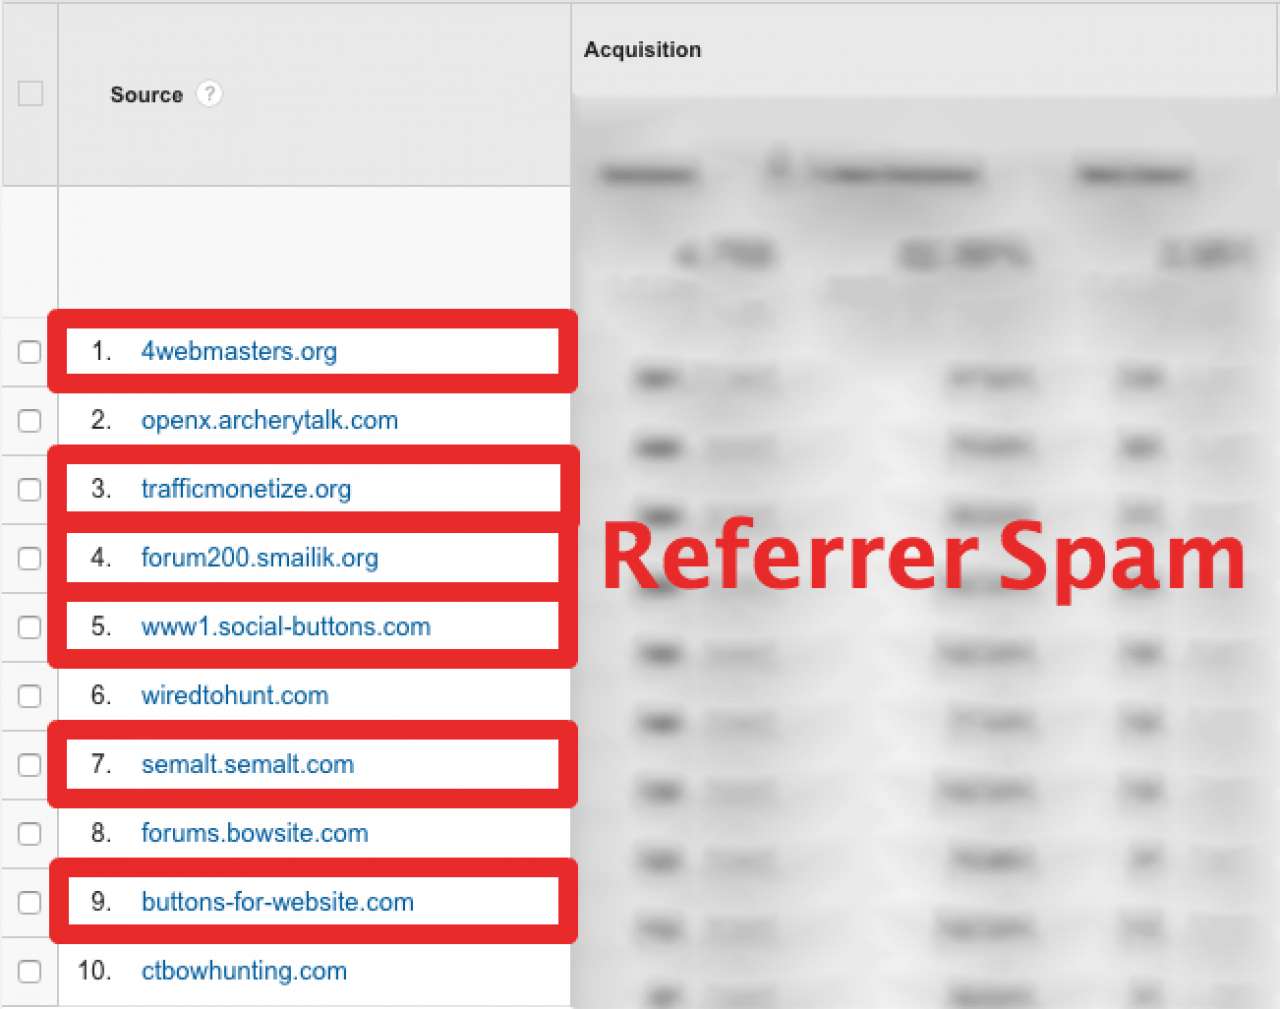
Spam of any kind can be obnoxious at best and damaging at worst. Unfortunately, spam can creep into your Google Analytics data and skew your numbers. Spammed data is a misrepresentation of your audience’s behavior and can lead you to draw inaccurate conclusions about your website. Google Analytics spam appears in the referral section, which is used to show the number of visitors coming to your website from other sites that link to yours. Understanding how your audience finds you is a crucial part of web marketing, so it is important that this information be accurate. You can easily create a filter to keep spam out of your Google Analytics data.
Most of the Google Analytics spam you will encounter works at random and does not set a hostname, or just uses a fake one. It’s fairly obvious what websites are spam and which ones are valid as they will always use a real hostname. The easiest, most comprehensive way to get rid of analytics spam is to filter out the spam hostnames. Here’s how to create a Valid Hostnames filter:
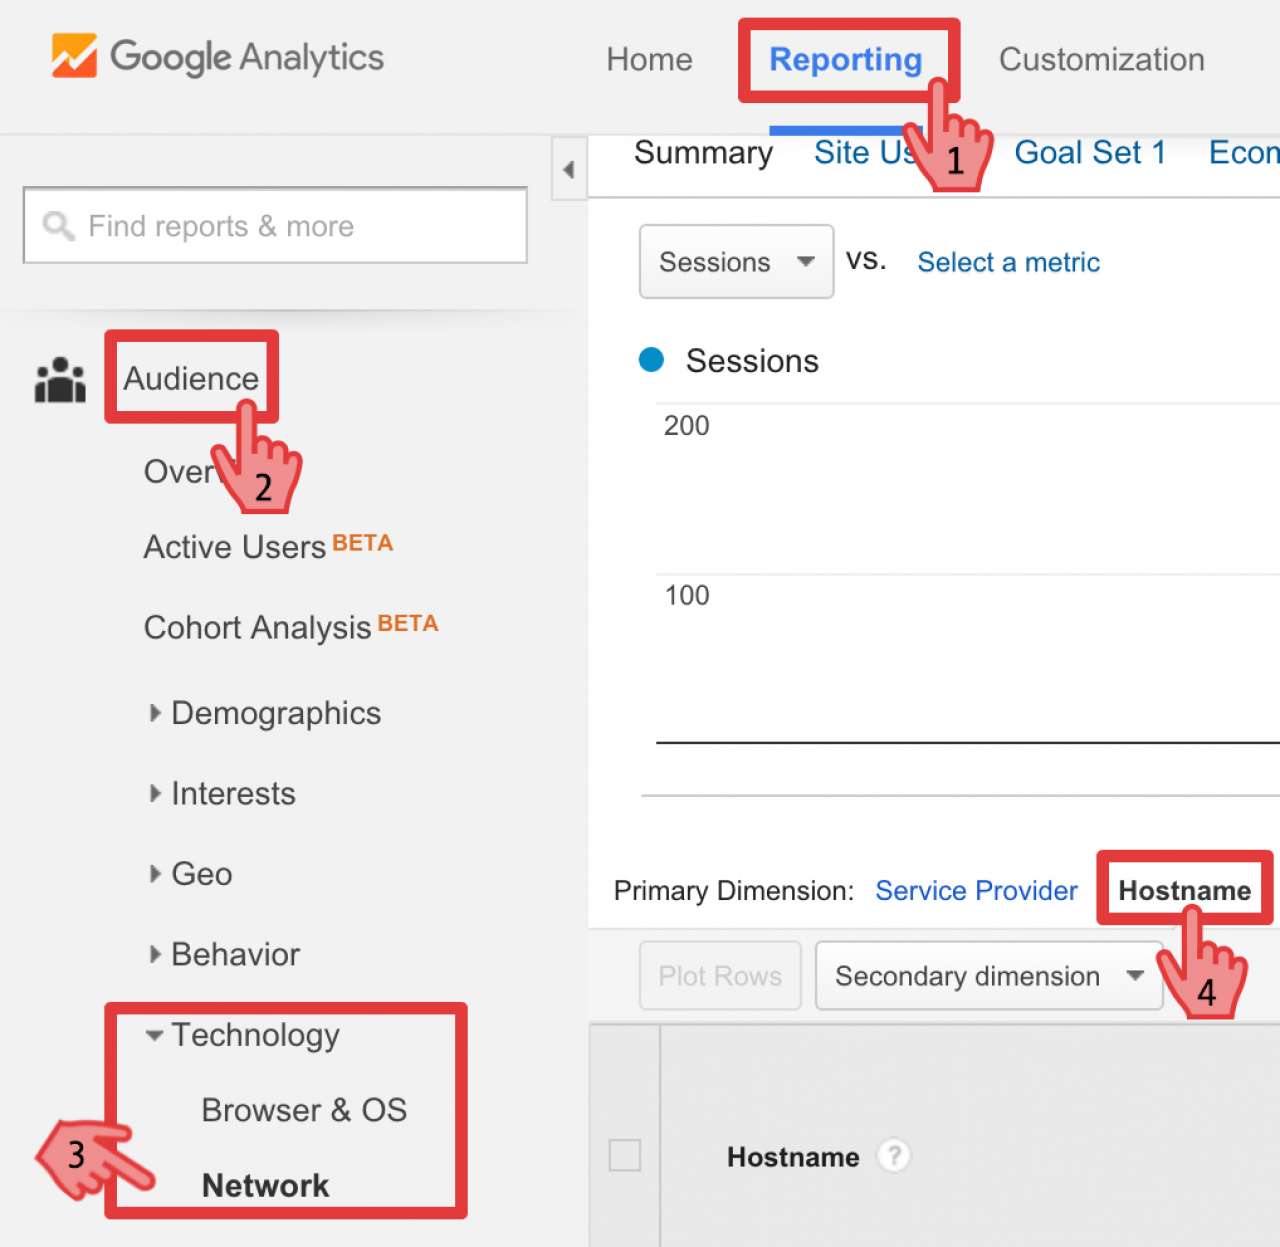
Create a list of valid hostnames. If you have an existing Google Analytics, account you can find hostnames in the Audience Report underneath Technology and Network.
If this is a new account, make a list of your valid hostnames. These will be your domains and subdomains and will look like the following
- yourdomain.com
- blog.yourdomain.com
- es.yourdomain.com
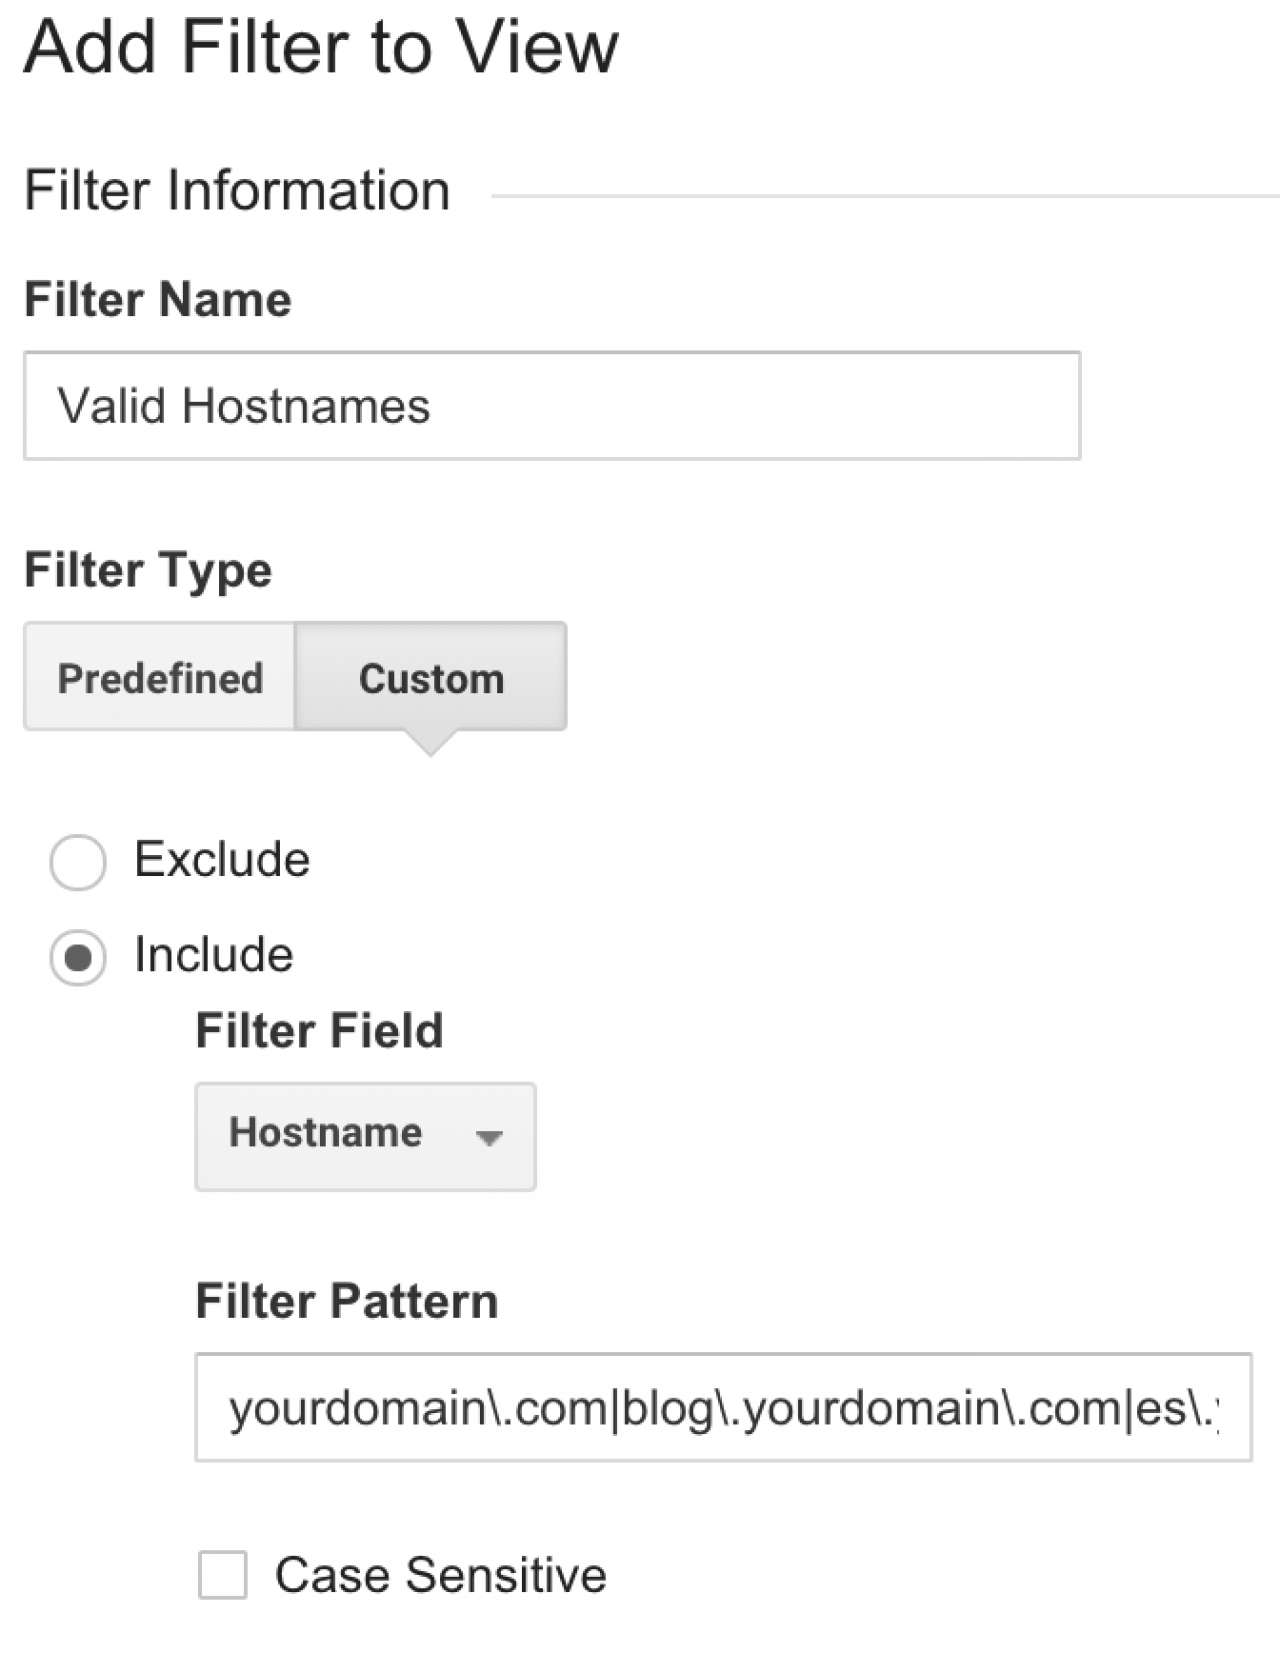
With your list, create a regular expression. This is simply a list of your domains separated by vertical bars and backward slashes.
yourdomain\.com|blog\.yourdomain\.com|es\.yourdomain\.com
Copy your regular expression and create a Custom Filter.
Verify the filter, then apply to your Test and Reporting Views.
Google Analytics collects valuable data that allows you to understand who your users are and how they are interacting with your website. While your fact-driven strategies may be altogether incorrect if you’re analyzing raw or incomplete data, by following the steps we have outlined here, your Google Analytics data will be more accurate. Thus, providing better information for you and your marketing team.